Environments & Variables
Environments are named sets of key-value variables scoped to a project. Switching the active environment changes the values injected into all probes and chains without modifying any probe configuration. This lets you reuse the same probes against different targets (e.g. dev, staging, prod).
Where environments live
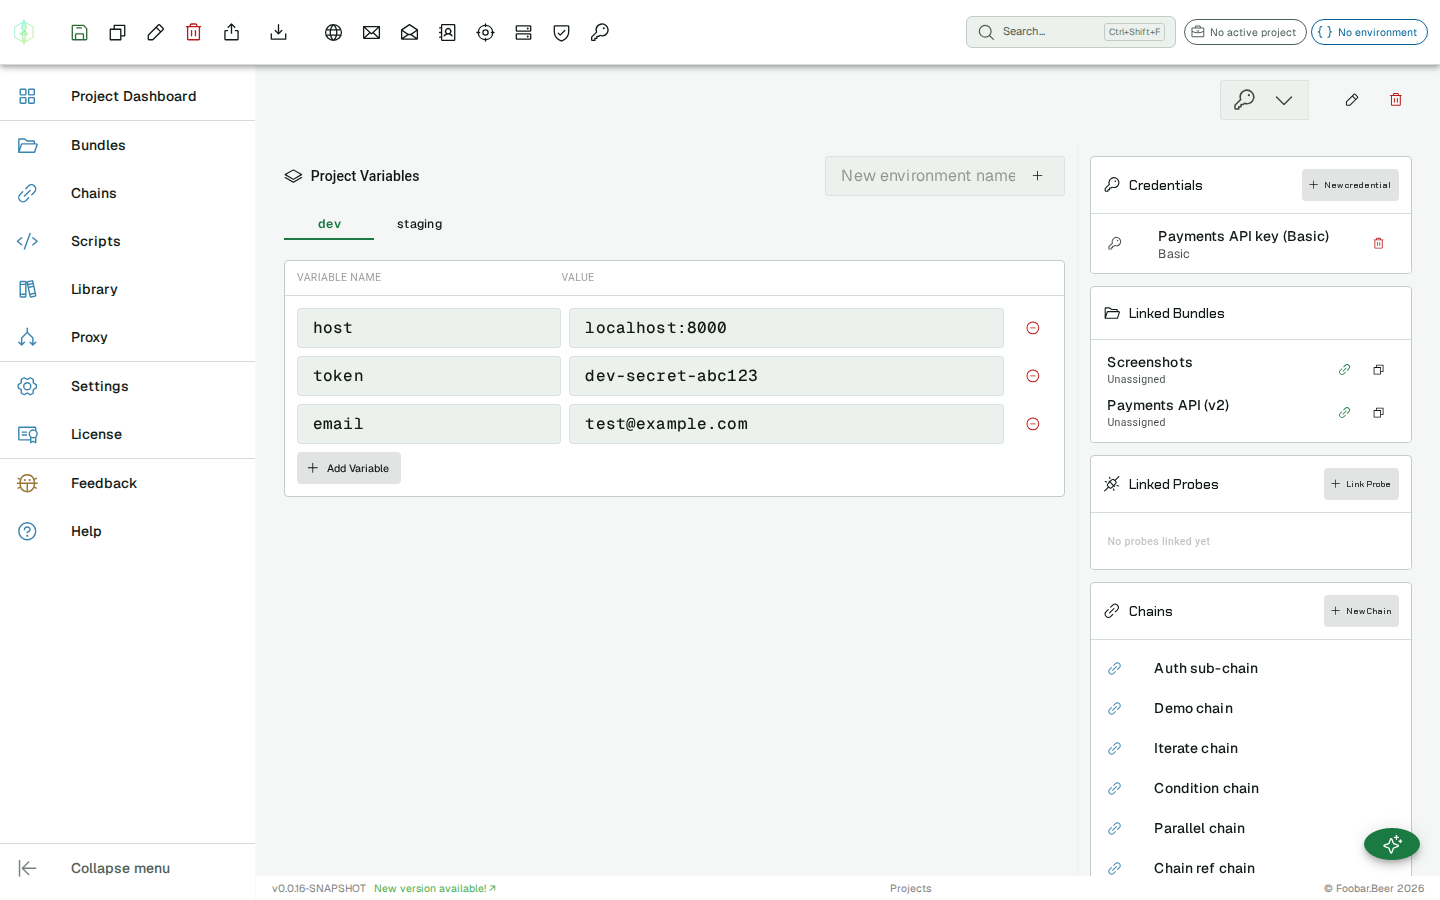
Section titled “Where environments live”Environments belong to a project — not a bundle. Open the project dashboard (click the project chip in the app bar, then Project Dashboard) to manage its environments. The environment editor is the main (left) panel of the dashboard; the linked bundles, probes, chains and scripts sit in the panel on the right.
The active project and its active environment are always visible in the app bar:
Creating an environment
Section titled “Creating an environment”In the project dashboard, type a name in the environment name input at the top of the editor (e.g. dev, staging) and click the + button. Each environment becomes a tab — click a tab to edit that environment.

Per-environment actions
Section titled “Per-environment actions”With an environment tab selected, its actions appear in the action toolbar at the top of the app:
| Action | Effect |
|---|---|
| Save | Persists the environment’s variables |
| Clone | Duplicates the environment as … (copy) |
| Rename | Renames the selected environment |
| Delete | Removes it (with a confirmation prompt) |
| Export | Downloads it as a standard environment file (<name>.environment.json) |
| Import | Adds an environment from a file (see below) |
Adding variables
Section titled “Adding variables”Add key-value pairs to the environment. Variable names are case-sensitive.
| Key | Value |
|---|---|
host | api.dev.example.com |
token | dev-secret-token |
email | test@example.com |
Using variables in probes
Section titled “Using variables in probes”Reference a variable anywhere a text field is supported using double curly braces:
https://{{host}}/api/usersAuthorization: Bearer {{token}}Supported fields per probe type:
| Probe | Fields |
|---|---|
| HTTP | URL, body, headers, query parameters, cookies |
| SMTP | Host, each command’s data |
| IMAP | Host, each command’s data |
| LDAP | Host, DN, password, filter, attribute, value |
| DNS | Resolver host, query name |
| SpamAssassin | Host, message body |
Switching environments
Section titled “Switching environments”Click the environment chip in the app bar to open the environment picker for the active project. Click any environment to activate it in one step. To deactivate all environments, choose No environment at the top of the list.
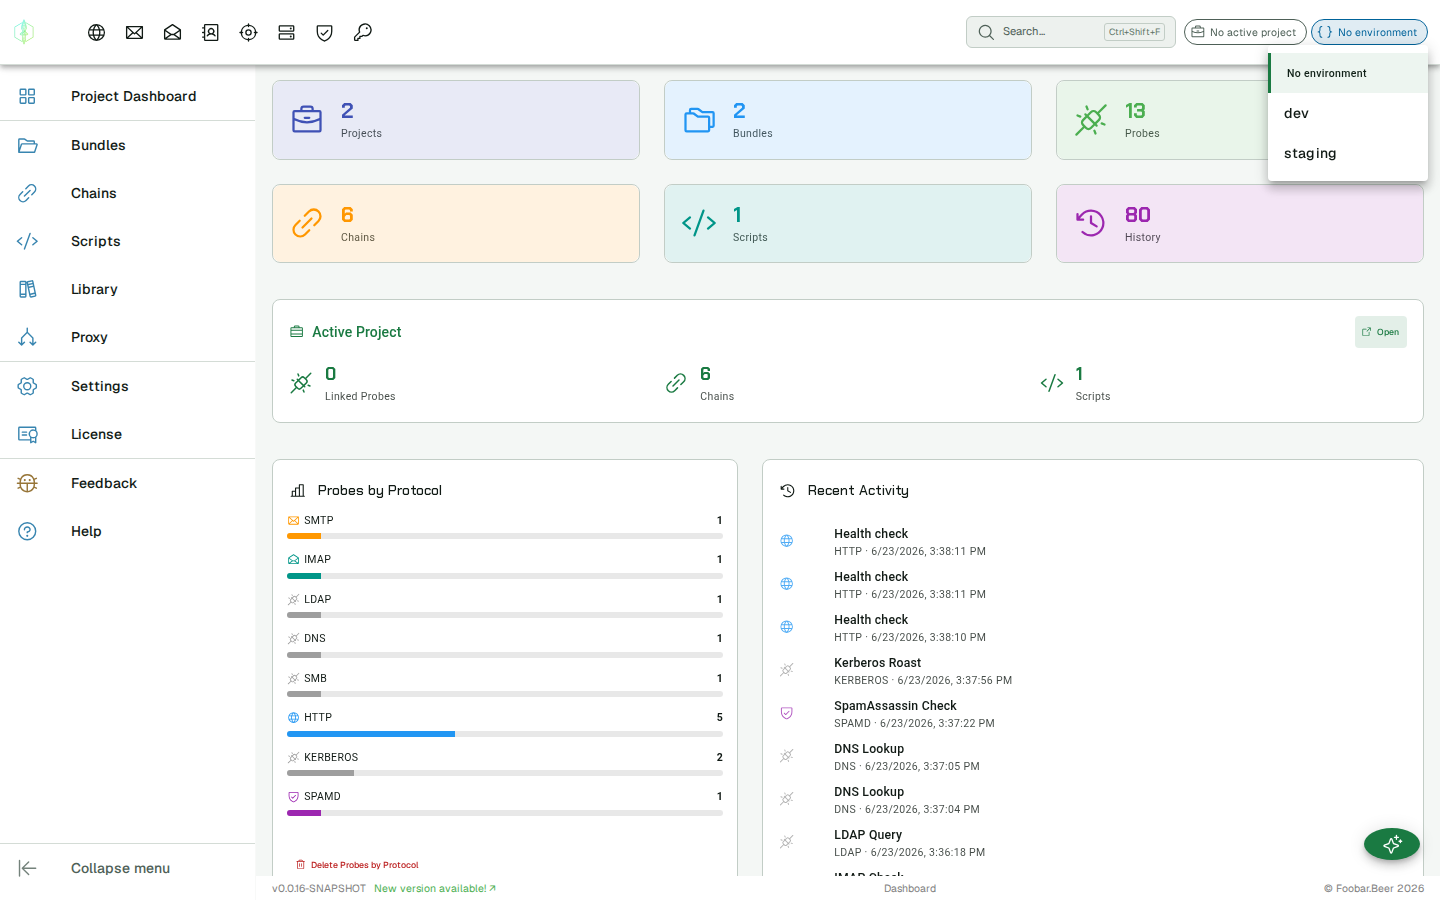
The active environment per project is stored locally and persists across sessions — it is restored automatically the next time you open the app or switch back to that project.
The active environment is stored locally and does not affect other users.
Variable priority
Section titled “Variable priority”If a probe defines its own inline variables with the same name as an environment variable, the probe’s inline variable wins.
Importing & exporting environments
Section titled “Importing & exporting environments”Use Export (in the action toolbar with an environment selected) to download the environment as a standard environment file. The file uses the common environment schema, so it imports into other request tools as well as back into VirtuProbe.
Use Import to add an environment from a file. Supported formats:
- A standard environment export (
.json) - A dotenv file (
.env) —KEY=valuelines - A Bruno environment file
The imported environment is created in the active project and selected automatically.
Environments in chains
Section titled “Environments in chains”Chains resolve variables server-side at execution time using the active project’s environment. Variables produced by extractors in earlier steps take precedence over environment variables of the same name.